How to Make Natural Baby Food at Home
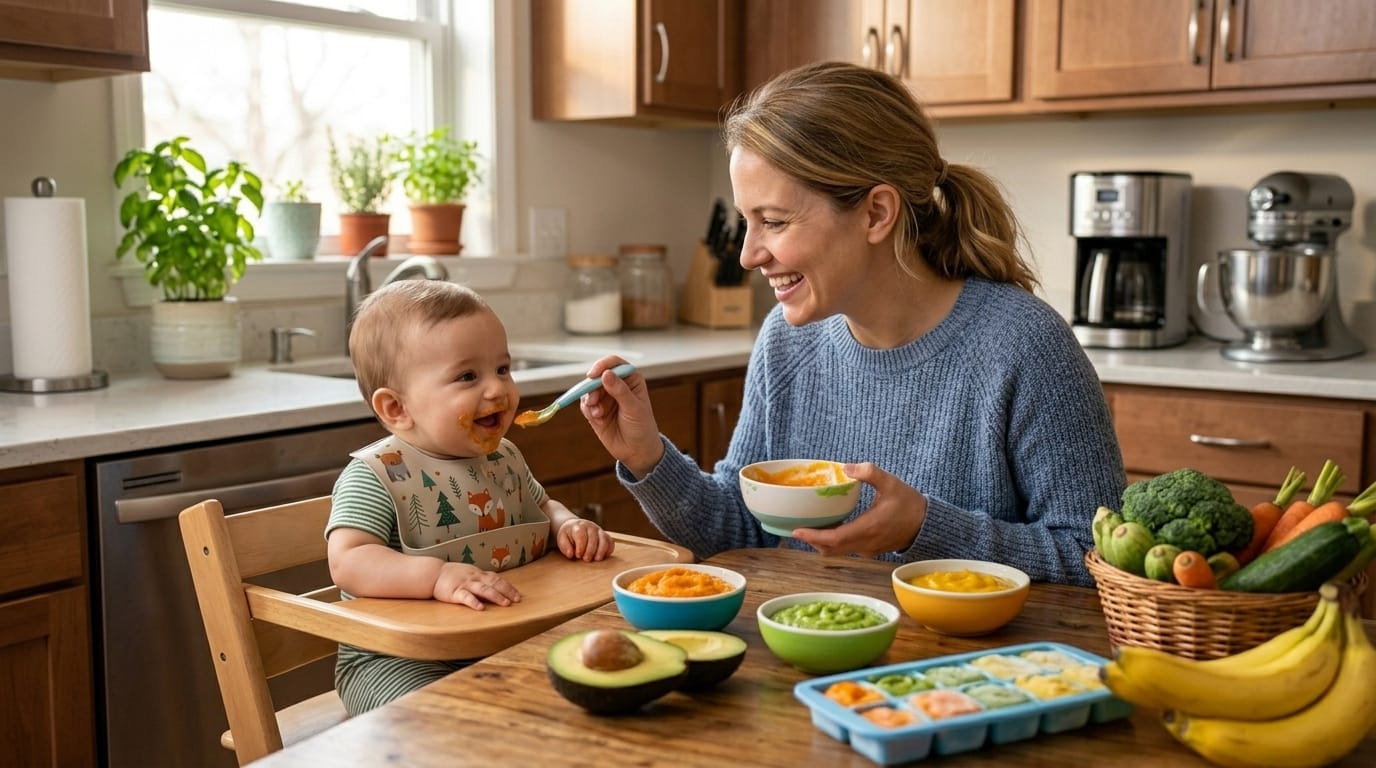
Welcome to the exciting and sometimes messy journey of starting your little one on solid foods! If you are wondering how to make natural baby food right in your own kitchen, you have come to the perfect place.
It is completely normal to feel a bit overwhelmed when your baby reaches the milestone of eating solids. You want the absolute best for them, and making their meals from scratch is a fantastic way to ensure they get top-tier nutrition.
Grab a cup of coffee (or tea!), sit back, and let’s walk through this process together. I promise you, preparing your own baby meals is much easier than it sounds, and it is incredibly rewarding.
Why Choose Homemade Over Store-Bought?
You might be asking yourself if it is really worth the extra effort to skip the jarred stuff. The short answer is an absolute yes!
First of all, you have complete control over every single ingredient that goes into your baby’s tummy. There are no hidden preservatives, added sugars, or unnecessary fillers.
Secondly, homemade meals taste fresh and delicious, helping your baby develop a palate for real, whole foods. This can actually prevent picky eating habits later in life.
Lastly, it is incredibly cost-effective. Buying fresh fruits and vegetables and pureeing them yourself will save you a significant amount of money over time compared to buying pre-packaged pouches.
Is Your Baby Ready for Solids?
Before we dive into the kitchen, we need to make sure your tiny human is actually ready to start eating. Most pediatricians recommend starting solids around six months of age.
However, age is just a number. You should look for specific physical signs that your baby is ready for this big step.
Here are the key milestones to watch for:
- Good head control: They can sit up with little or no support and hold their head steady.
- Loss of the tongue-thrust reflex: They no longer automatically push food out of their mouth with their tongue.
- Showing interest: They reach for your food, open their mouth when you eat, or stare intensely at your dinner plate.
- Doubled birth weight: This is a general guideline that indicates their digestive system is maturing.
Important Note: Always consult with your pediatrician before introducing solid foods to your baby, just to be on the safe side!
Essential Tools You Need in Your Kitchen
You do not need a fancy, expensive baby food maker to get the job done. In fact, you probably already own most of the tools you need!
Keep it simple and use what you have. Here is a basic checklist of equipment that will make your life much easier.
- A good blender or food processor: This is essential for getting those purees perfectly smooth.
- Steamer basket: Steaming vegetables and fruits helps retain their vital nutrients better than boiling.
- Ice cube trays: These are the secret weapon for storing perfectly portioned meals in the freezer.
- A sharp knife and peeler: For prepping all those fresh, beautiful ingredients.
- Airtight storage containers: Glass or BPA-free plastic containers are great for keeping food fresh in the fridge.
Mastering the Basics: How to Make Natural Baby Food Step-by-Step
Now, let’s get down to the fun part. The process of preparing these tiny meals is actually very straightforward.
Once you get the hang of it, learning how to make natural baby food will just become a quick, natural part of your weekly routine. Let’s break it down into four simple steps.
Step 1: Choose and Clean Your Ingredients
Start by selecting fresh, high-quality produce. Organic is great if it fits your budget, but thoroughly washed conventional produce is absolutely fine too.
Wash all fruits and vegetables under cold running water. Even if you plan to peel them, washing prevents bacteria on the outside from getting onto the flesh when you cut into it.
Step 2: Prep and Cook Gently
Peel your fruits and vegetables and remove any seeds, pits, or tough stems. Cut the food into small, even cubes so they cook uniformly and quickly.
Steaming is the best cooking method because it preserves the water-soluble vitamins. Simply place the diced food in a steamer basket over boiling water and cook until they are easily mashable with a fork.
Step 3: Puree to the Perfect Consistency
Transfer the cooked food into your blender or food processor. If your baby is just starting out, you will want a very smooth, watery consistency.
You can thin out the puree by adding a little bit of breastmilk, formula, or the leftover cooking water. As your baby gets older and more experienced, you can gradually leave the food a bit chunkier.
Step 4: Portion, Store, and Freeze
Spoon the puree into clean ice cube trays, cover them tightly, and pop them in the freezer. Each cube usually equals about one ounce, making portion control a breeze.
Once the cubes are frozen solid, transfer them into labeled, freezer-safe bags. Don’t forget to write the date and the type of food on the bag!
The Best First Foods for Your Baby
When introducing solids, it is best to start with single-ingredient purees. This helps you easily identify any potential food allergies.
The “three-day rule” is a great practice here. Introduce one new food and wait three days before introducing another, watching for any signs of a reaction like a rash or tummy trouble.
Here are some fantastic, nutrient-dense first foods to try:
- Avocado: Creamy, rich in healthy fats for brain development, and requires no cooking!
- Sweet Potato: Naturally sweet, packed with Vitamin A, and has a great, smooth texture when pureed.
- Bananas: Easy to digest, sweet, and full of potassium. Just mash and serve.
- Butternut Squash: A lovely mild flavor that most babies easily accept.
- Apples: Cooked and pureed apples (applesauce) are a classic favorite that mixes well with other flavors later on.
- Oatmeal: A gentle, iron-fortified single-grain cereal is a great way to introduce texture.
5 Easy and Delicious Homemade Recipes
Ready to put your chef’s hat on? Here are five super simple recipes to get you started.
These recipes require minimal ingredients and are guaranteed to make your baby smile.
1. The Creamy Avocado Mash
Avocado is nature’s fast food for babies. Cut a ripe avocado in half and remove the pit.
Scoop out the flesh and mash it thoroughly with a fork until smooth. Add a splash of breastmilk or formula to achieve the desired creaminess.
2. Sweet Potato Wonder Puree
Preheat your oven to 400°F (200°C). Wash a sweet potato, poke a few holes in it with a fork, and bake for about 45 minutes until very soft.
Let it cool, peel off the skin, and blend the bright orange flesh until it is completely smooth. You can add a tiny pinch of cinnamon for extra flavor!
3. Apple and Pear Delight
Peel, core, and chop one sweet apple (like Gala or Fuji) and one ripe pear. Place them in a steamer basket and steam for about 8-10 minutes.
Once tender, transfer the fruit to your blender. Blend until smooth, adding a spoonful of the steaming water if it looks too thick.
4. Green Pea Powerhouse
Frozen peas are incredibly convenient and lock in nutrients immediately after harvesting. Steam one cup of frozen peas for about 4 minutes until they are bright green and tender.
Blend the peas thoroughly. Because peas have thin skins, you might want to push the puree through a fine-mesh sieve to ensure it is extra smooth for a beginner eater.
5. Banana and Blueberry Smash
Mash one ripe banana in a bowl. In a small pot, lightly simmer a handful of blueberries until they burst and become soft.
Mix the blueberries into the mashed banana. This combination is antioxidant-rich and naturally sweet, making it a guaranteed hit!
Important Safety Rules When You Learn How to Make Natural Baby Food
Keeping your baby safe is always the top priority. While making homemade food is generally very safe, there are a few golden rules you must follow.
Understanding these safety guidelines will give you total peace of mind as you feed your little one.
Strictly Avoid Honey and Cow’s Milk Under Age One
Never give honey to a baby under 12 months old. It can harbor spores that cause infant botulism, a rare but very serious illness.
Similarly, standard cow’s milk should not replace breastmilk or formula before age one. Their tiny kidneys simply cannot handle the high protein and mineral content yet.
Skip the Salt and Sugar
Babies do not need any added salt or sugar in their diet. Their kidneys are not developed enough to process added sodium.
Rely on the natural sweetness of fruits and the savory flavors of vegetables. If you want to enhance the taste, use baby-safe spices like mild cinnamon, nutmeg, or a hint of mint.
Practice Excellent Kitchen Hygiene
Babies have developing immune systems, so cleanliness is non-negotiable. Always wash your hands vigorously with soap and warm water before handling their food.
Ensure all your cutting boards, blenders, and storage containers are completely clean. Do not double-dip the feeding spoon back into a large container, as bacteria from your baby’s mouth can spoil the rest of the food.
Be Aware of Choking Hazards
As your baby transitions to chunkier foods, you must be vigilant about choking risks. Avoid whole grapes, cherry tomatoes, nuts, popcorn, and hard candies.
Always cut round foods (like grapes or blueberries) into small quarters, not just in half. Ensure all meats and tough vegetables are cooked until they are extremely soft and cut into tiny pieces.
Transitioning to Stage 2 and Stage 3 Foods
As your baby grows, their dietary needs and chewing abilities will evolve. You won’t be serving watery purees forever!
Around 7 to 9 months, you can start thickening the purees and introducing “Stage 2” foods. This means blending the food less and leaving some soft, tiny lumps to encourage them to chew.
You can also start combining flavors. Try mixing sweet potato with apple, or avocado with banana. This is an exciting time to introduce soft proteins like pureed chicken, lentils, or mashed beans.
By 10 to 12 months, your baby is ready for “Stage 3” foods. These are soft, bite-sized pieces of real food that they can pick up with their fingers. Think soft scrambled eggs, small pieces of ripe fruit, and well-cooked pasta.
Storing and Reheating Safely
Knowing how to properly store and reheat your baby’s meals is just as important as knowing how to make natural baby food. Proper storage prevents foodborne illnesses.
Freshly made fruit and vegetable purees can be kept in the refrigerator for up to 48 hours. Meat and poultry purees should be consumed within 24 hours if kept in the fridge.
For long-term storage, the freezer is your best friend. Frozen baby food is generally safe and retains its quality for up to three months.
When it is time to eat, thaw the food in the refrigerator overnight. You can serve it cold, at room temperature, or slightly warmed. If you warm it, always stir it well and test the temperature on the inside of your wrist before feeding your baby to prevent mouth burns.
Conclusion
Taking the leap into preparing homemade meals for your baby is a wonderful decision. Not only does it provide them with the freshest, most wholesome ingredients, but it also creates a beautiful bonding experience in the kitchen.
Remember, this process does not have to be perfect. If a puree turns out a little too watery, or if your baby makes a funny face at a new vegetable, just laugh it off and try again tomorrow. Parenthood is all about learning as you go!
Now that you have the knowledge, it is time to take action! Head to your kitchen, grab a sweet potato or a banana, and start mashing. Your baby’s delicious, healthy culinary journey starts today have fun with it!